How To Clear DNS Cache On Windows And Mac
Sometimes it happens that while working on a PC you are unable to access certain websites, IP addresses or may face other internet related issues. The best way to solve all of these problems is by resetting or deleting the DNS cache.
By doing this the DNS is restored and the problems that you might be facing will also be gone. After this, you will be able to use the internet or access the website that may not be loading earlier. To flush DNS cache you can follow the given steps mentioned for both Windows and Mac.
Contenido
What Is DNS Cache?
DNS cache is the storage of all the website domain names, their IP addresses and their records saved on the system. This cache can sometimes become obsolete as the server or IP addresses can change from time to time and in case you access any website from the records in DNS cache it may show DNS error. To resolve these problems you can either clear or flush the DNS cache to restore the website or internet connections.
Vaciar caché de DNS
Here you will find the steps and methods that you can use in order to delete, clear or reset the DNS cache by just using command prompt and commands.
Clear DNS Cache In Windows
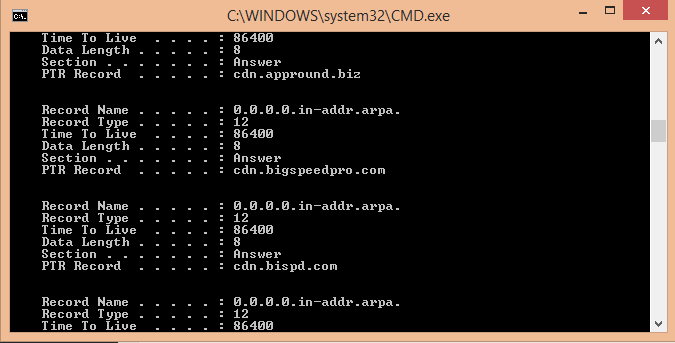
You can check the DNS cache from the command prompt on Windows. Type ipconfig / displaydns and select hit enter. Then the command screen will show all the DNS that is present on the system and you can scroll through to see them.
Now to delete or clear the DNS Cache:-
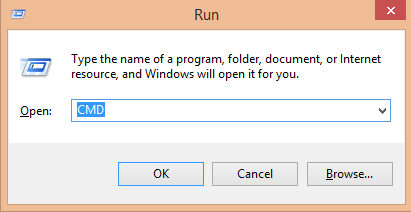
- Prensa Windows + R key to open the Run program. Now enter CMD on the run program and hit OK.
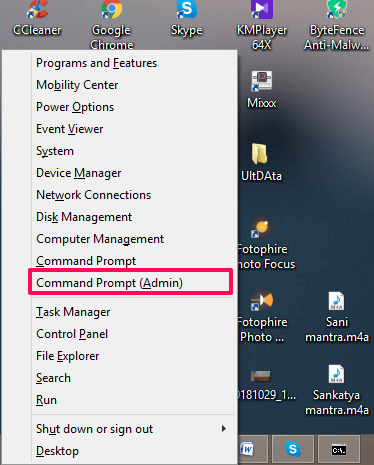
 O presione Windows + X key and from the menu select Command Prompt admin.
- This will open the command prompt window from where we will flush all DNS cache. In the command prompt enter the given command i.e ipconfig / flushdns and hit enter on the keyboard.
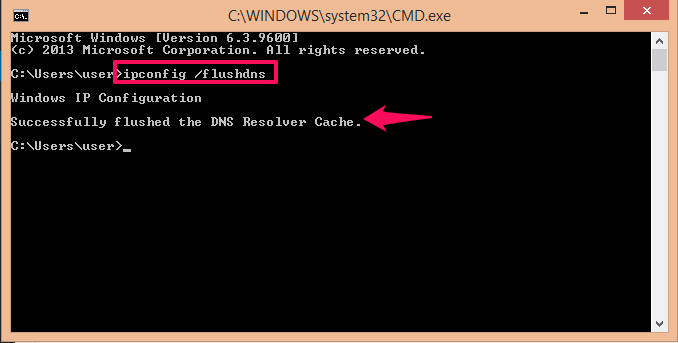 After you hit enter the command screen will show the message Windows IP configurations and after it, a message saying Successfully flushed the DNS Resolver Cache.
Once this message is displayed, it means your DNS resolver cache is flushed or cleared. This method will work on every version whether 7,8,8.1 or 10.
Clear DNS Cache In Chrome
In case the problems still persist after clearing the Windows DNS cache then try clearing DNS from your Chrome browser.
- Open your Chrome browser and in the URL enter chrome: // net-internals / # dns y presiona enter.
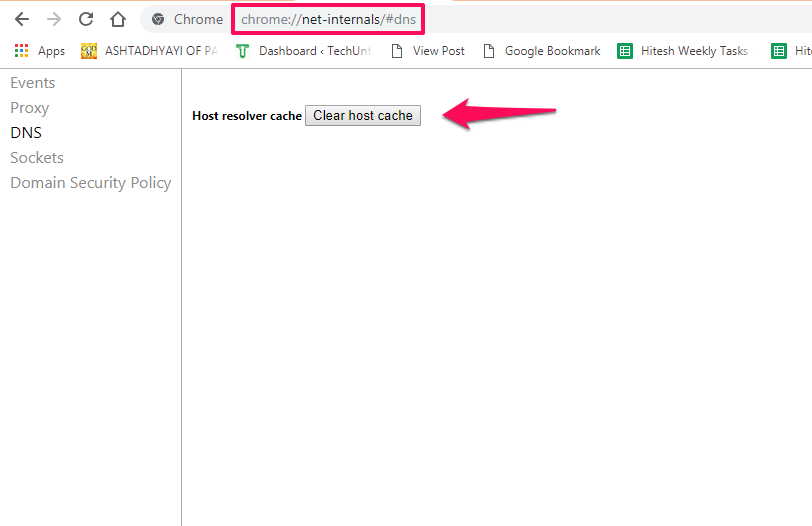
- This will open the Host Resolver for DNS. Here you will see the option to Borrar caché de host. Click on it and it will clear DNS resolver cache for Chrome browser.
Lea también Cómo exportar contraseñas desde Chrome
Reset And Flush DNS Cache In Mac
The command mentioned here is for macOS Sierra.
- Abierta terminal.
- Ahora, escribe sudo killall -HUP mDNSResponder; sleep 2; echo macOS DNS Cache Reset y presiona enter.
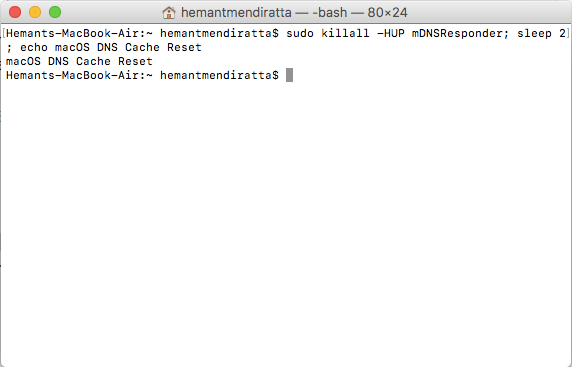
The command will be successfully executed and you should see – “macOS DNS Cache Reset”. This will reset DNS cache on macOS Sierra.
Resumen
This was the simplest method to reset and flush DNS cache on Windows and macOS. In case you use Chrome browser and still have problems even after deleting the DNS for PC then you can go for the method to clear the DNS cache from Chrome browser and then open the same website again. In case of any queries feel free to comment below.
últimos artículos